|
Michael McFadyen's Scuba Diving - HMNZS Waikato
In June 1963 the New Zealand Government placed an order for their first Leander Class frigate. The Leander Class were a United Kingdom design developed from the earlier Rothesay and Whitby classes which NZ also had in service. The Leander Class was almost the same as the Australian River Class (eg HMAS Swan now a dive site off Dunsborough, Western Australia).
On 10 January 1964 the hull of the new destroyer was laid down in the Harland & Wolff Ltd shipyard at Belfast, Northern Ireland (the same shipyard that built RMS Titanic). The ship was launched on 18 February 1965 and named HMNZS Waikato. The new ship was 113.4 metres long (109.7 metres waterline) and 12.5 metres wide. It had a tonnage of approximately 2,500 tonnes. The ship was powered by two English Electric shaft geared steam turbines (30,000 shp) giving a top speed of 34 knots. Steam came from two Babcock and Wilcox boilers. It had a range of 8,520 kilometres at 15 knots.
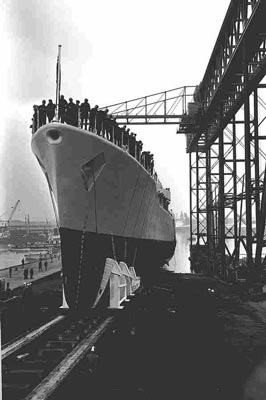 |  |
| The launch of HMNZS Waikato in Belfast | HMNZS Waikato entering Garden Island, Sydney Harbour |
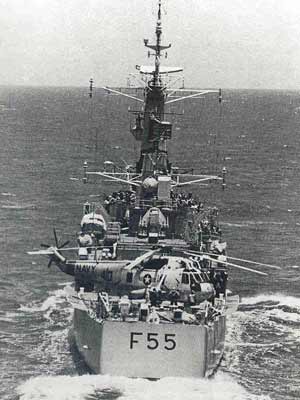
Armament for the new ship was two Vickers 4.5" (114mm) L45 DP guns in one Mk 6 twin mounting in front of the bridge, one Limbo (ATW) 3-barrelled DC mortar, a Sea Cat missile system (removed early 1990s and replaced by Phalanx CIWS), four 12.7 mm AA guns and two three tubed Mod 5 Mark 46 torpedoes in Mark 32 torpedo tubes. Defensive equipment included two Mark 36 SRBOC Mod 1 chaff launchers. The Waikato also carried a helicopter, a Westland Wasp, the first NZ warship to do so.
The Waikato was fitted out and on 19 September 1966 she was commissioned into the Royal New Zealand Navy as F55. The crew of 18 officers and 248 seamen spent the next almost seven months off Portsmouth and Portland in England doing sea trials and exercises before being cleared to head to New Zealand. On 8 April 1967 she departed the UK and travelling via Panama Canal and Pearl Harbor, she arrived at Mount Maunganui (the main port for the Waikato area) on 2 June 1967.
The Waikato had a minor engine room fire on 17 October 1967 at Auckland and another on 5 October 1970 when exercising 320 kilometres north-east of Auckland. After this second incident, she had to be towed back to Auckland by HMS Minerva. the damage in both cases was not serious.
On 15 March 1970 three crewmen were washed overboard from HMNZS Waikato while escorting the Royal Yacht Britannia from Wellington. There were heavy seas and one of the crewmen was not recovered.
The Waikato underwent a refit during the period 1975 to 1977 and was recommissioned on 6 August 1977. She had another refit of 12 months finishing November 1987.
 |  |
| The US Navy Sea King on the helipad of HMNZS Waikato | The arrow shows the location of HMNZS Waikato |
On 1 March 1976 when at the Naval Base dockyard at Devonport, Auckland, the Waikato suffered a boiler explosion, injuring several men. There was no damage to the ship.
In April 1978 when patrolling in the North Pacific Ocean (presumably as part of a naval exercise with the US Navy), a very large Sea King helicopter landed on the helipad of the Waikato. What is unusual about this is that this helicopter is much larger than the ship's helipad was designed to carry and the helicopter had less than one minute's fuel left when it landed!
During the Falkland War (between United Kingdom and Argentina) which started in April 1982, the Waikato's sistership, HMNZS Canterbury relieved UK warships serving in the Persian Gulf so that these ships could serve off the Falkland Islands. She did this from June to August 1982. She was relieved by the Waikato and the Canterbury took over again in December 1982. She served till April 1983 when the Waikato took over again. The Waikato returned to New Zealand in October 1983.
On 6 December 1984 when on exercises in the Bay of Plenty (North Island), a boiler pump in the Canterbury failed and two days later the other failed as well. The Waikato had to tow her back to Auckland.
The Waikato was also used during the Bougainville (part of Papua New Guinea) Peace Negotiations.
In the 1980s Australia and New Zealand decided to build new ships to replace their older warships. This project was called the Anzac Ship Project. By the late 1990s the Waikato was showing her age (now 30+ years). The Waikato was decommissioned in 1998.
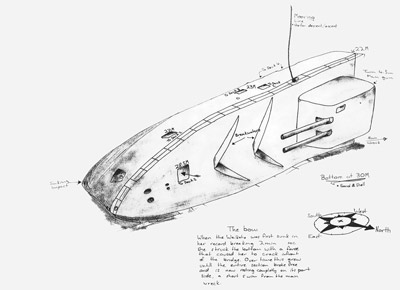 |  |
A diagram of the bow of the Waikato
Courtesy of Dive! Tutukaka | Phil Goodman with a spare prop from HMNZS Waikato
- this is at the entrance to Tutukaka Marina.
The real one from the wreck was stolen after it
was taken off the ship before being scuttled |
The ship was put out to tender and ended up being sold to a (then) non-existent organisation for $10,000. This bid was put in by the owner of Dive! Tutukaka, Jeroen Jongejans who then had to arrange for the organisation to be created! One of the unsuccessful tenderers wanted to hire the ship for use for accommodation and viewing during the America's Cup in early 2000. A deal between that tenderer and the winning bidder was agreed on, the price NZ$250,000 and a deposit of 10% paid. However, the hirer defaulted and the whole arrangement this fell through and eventually the port authority attempted to seize the Waikato to pay outstanding wharf fees. However, Jeroen had ensured that he had a watertight contract with the "hirer" and the port authority had to go after that person and could not seize the Waikato.
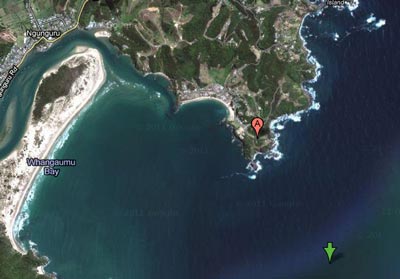
On 18 November 2000 the Waikato was scuttled south of the heads to Tutukaka on the North Island of New Zealand.
The Waikato now lies at a depth of about 28 metres on a sandy bottom in Whangaumu Bay south-east of Motutara Island. It is located at GPS S35° 39' 07.9" E174° 32' 38.3" (the stern mooring using WGS84 as a datum). It is easy to find as there are at two least two moorings. These are on the bow and stern. It is about 15 minutes from Tutukaka Harbour.
 |  |
Kelly and one of the blades of
the starboard prop - note how dark it is | The hole from the stern into the wreck |
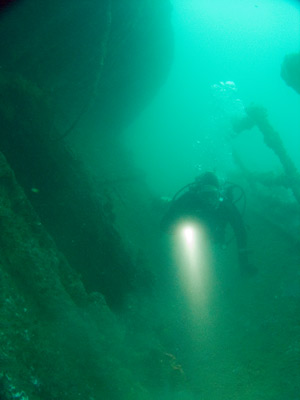
The wreck faces a bit south of east. The main part of the wreck has a list to port (as most wrecks appear to) of about 30°. While the wreck is basically level (bow to stern), the deepest part of the wreck normally dived is the stern as the prop shafts and rudders are on the sand. You could certainly do quite a few dives on this wreck as it is large (over 110 metres long) and there are many levels to explore. However, for overseas visitors who are only doing half a dozen or so dives in the Tutukaka area (Poor Knights), I would recommend only one or two dives as there are lots of great reef dives out at the Poor Knights that should be done instead.
The following descriptions are based on doing a single dive on the wreck. Normal dives use the stern mooring. The mooring is attached to the starboard side near the rear of the helicopter hangar. Once you reach the wreck you should be at about 21 metres. Drop right over the side and head towards the stern (if you want to see the prop) or otherwise follow the deck to the stern.
 |  |
| The ironing press in the laundry | The first lot of toilets found from the stern |
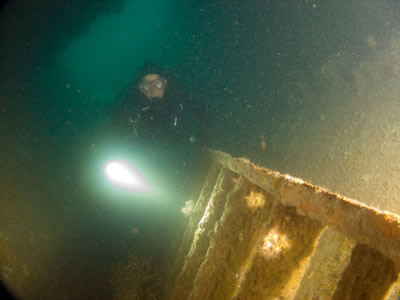
The starboard prop is still there. The port prop is actually located at the approach to the Tutukaka Marina. In any case, due to the tilt of the wreck, the starboard prop and rudder are more visible. The depth here is just over 28 metres. You only want to spend 30 seconds or so here as otherwise you will be greatly penalised with a reduced bottom time. Ascend up to the stern and you will see that there is an entry from the stern hull area into the wreck. This is unlike HMNZS Canterbury.
If you want, have a look at the stern area. This is the helicopter landing pad and there are railings at the rear (above the stern) and on the port and starboard sides there are railings that drop down when the helicopter is landing. These railings are both upright and lying flat. There are great displays of jewel anemones on these railings.
 |  |
| The urinals | This is well inside the wreck |
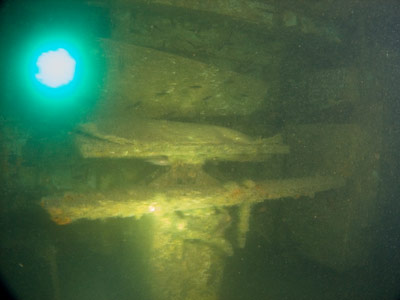
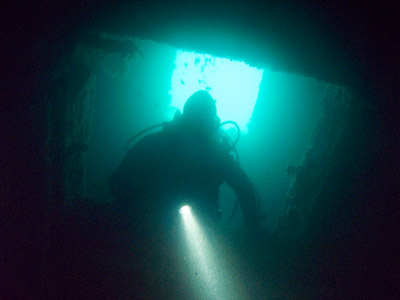
If you come to the actual stern you will see a hole giving access into the second level of the wreck. The entry is at about 24 metres. This is the main inside deck and is the deck you should explore. Inside, the wreck in this area is generally quite open and spacious. Even the passageways are quite large. Follow the passage and you will pass many cabins and rooms. On the right, the first one is the laundry. Unlike the Canterbury this one has some items left here. There is a large ironing press still there (HMAS Swan, a very similar ship, has a washing machine in here).
Continue along the main passageway forward and there are many rooms to see. Off to the left are the dining areas and galleys. You can see through hatches in the floor the gearbox for the starboard engine. There are many holes leading to the outside from the rooms that run off the passageway. The depth remains about 23 metres all the way.
 |  |
| The first lot of wires that start blocking the way | Kelly deep inside the wreck |
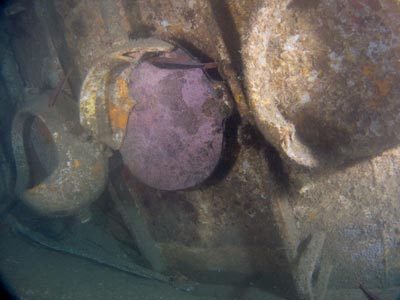
You will pass by some toilets, at least four on the right, then a couple more on the left. There are three urinals here as well. There are lots of exits, they are very obvious.
You will go past the galley (on your left) and then cross over the engine room hatches. If you only do one dive here, you will really not have time to examine the engine room.
Soon you come to the middle section of the wreck. Here there are lots of wires hanging down, I am unclear why these would not have been removed during the ship cleaning work. You have to be careful not to get hooked up. I decided to head out a hole to the starboard side rather fight past them.
 |  |
| The 4.5 inch guns - very dark | The front of the bridge |
Once out of the wreck, we headed forward and came to the end of the wreck. This is not the bow as you might imagine, it is where the wreck has broken in two. The bow section has broken away from the main part of the wreck just in front of the bridge. The bow section is about 15 metres from the main part of the wreck, about 30° to the right from the starboard side of the main section.
The bow section lies on its port side. Unlike HMNZS Canterbury and HMAS Swan, the gun turret of the Waikato is still in place. This has the two 4.5 inch guns in a large turret. On the day we dived the wreck, the visibility in this area was quite poor (worse than the rest of the wreck), so it was not a great photo opportunity.
We decided not to go to the actual bow so we headed back to the main part of the wreck. If the visibility is not too bad, go to the bow. Back on the main part of the wreck, you can explore the hull via the cut section. However, when we dived, there was a lot of surge (even though there was little swell) and it was not really safe to enter.
You can swim along the starboard outside passageway towards the stern. Here you can see the bridge, foremast, funnel area and rear mast. Under here you can enter the helicopter hangar and then exit out near the mooring.
 |  |
| Kelly swimming along the starboard passageway | The jewel anemones on the mast area |
Spend any remaining time exploring the masts and the funnel area (it has now fallen off).
In addition, between the funnel and the foremast there are some anti-aircraft guns (four of them)
There are a lot of fish on this dive. You should see heaps of leatherjackets, kingfish, large and small snapper, moki (morwong) of various species and more.
This is not a bad wreck dive, but the visibility is nothing like that at the Poor Knights and they are far better dives. We did about 33 minutes on the wreck (second dive) without going into decompression. Visibility when I dived the wreck was about five metres and in March, the water temperature over 21°C.
Return to the Tutukaka/Poor Knights menu.
References:
New Zealand Naval Vessels by R. J. McDougall - pages 45-48
|  v6.00.307 © 2003-2005

