|
Michael McFadyen's Scuba Diving - Hoyo Maru
The Hoyo Maru was launched on 29 August 1936 from the Mitsubishi Heavy Industry shipyard at Yokohama for Nippon Shosen (Nippon Tanker). She was an oil tanker of 8,629 tons gross, 143 metres long and 18.6 metres wide. Powered by a 5,555 hp Kawasaki MAN diesel engine driving a single prop, this gave the ship a cruising speed of 14 knots and a maximum speed of 16.1 knots. It could carry 95,000 barrels of oil. The ship entered service on 5 November 1936 and was taken over by the Imperial Japanese Navy on in 1940.
From 1941 the Hoyo Maru was based at Chuuk Lagoon taking fuel from here to the Marshall Islands and other Pacific locations. When taken into service, it had two 8 cm guns installed, one at the bow and one at the stern. On 31 March 1942 the ship was credited with the sinking of a US submarine 200 miles north east of Rabaul, Papua New Guinea, but this was incorrect as no submarine was lost on or near this date or at this location.
 |
| This is the Kaijo Maru, the identical sistership to the Hoyo Maru |
 |
| The Hoyo Maru on her maiden voyage |
During April and May 1942 she was part of the fleet preparing to attach Port Moresby in PNG. However, the Battle of the Coral Sea (the first naval battle during which the participating ships never fired a round at each other - all attacks were from the air) and the defeat of the Japanese meant that the invasion was cancelled. In early 1943 the Hoyo was damaged during a bombing attack, and she returned to Japan under her own power. She was repaired by Hitachi Zosen and in July 1943 she was back in service.
In February 1944 she was carring a load of fuel from Singapore to Chuuk when she was attacked by a US submarine. This is reported as being USS Haddock but another source state that it was USS Scorpion and this happened on 6 November 1943. Either way, the engine was put out of action and the ship was towed into Chuuk Lagoon.
On 17 February 1944 the Hoyo Maru was in the Repair Anchorage between Dublon and Fefan Islands, anchor closer to Fefan Island. It appears that she was hit by a number of bombs, one aft of the bridge on the starboard side and the other forward of the aft superstructure. It was also either hit by a torpedo near the rear engine room or a bomb and the damage from the earlier torpedo hit can be seen near the engine room.
A GPS Reading of N7° 22' 16.1" E151° 50' 40.3" using WGS84 as the datum will put you near the split in the hull.
 |  |
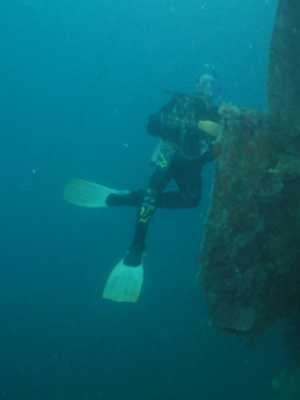
Phil Rose at the hull break
Photo by Kelly McFadyen | The break from the opposite side as above photo
Photo by Kelly McFadyen |
Today the ship lies upside down and broken into two sections. The hull is clearly visible from the surface as it is only three to four metres deep at the shallow bow section. The top of the wreck looks like a flat slightly sloping reef. The hull is heavily covered in coral and other growth, in some places the coral is more than a metre thick and you cannot even see the hull.
Dive boats anchor on the split which is located closer to the stern. There is probably one third of the wreck in the rear section and two thirds towards the bow. The bow section is shallower than the stern section. As you descend, you will notice that the ship broke its back when it hit the bottom as the bow section is on a shallower part of the bottom and the stern a fair bit deeper. From the split, head towards the stern as the interesting parts are deeper.
 |  |
Adam Florence and Kelly McFadyen swimming
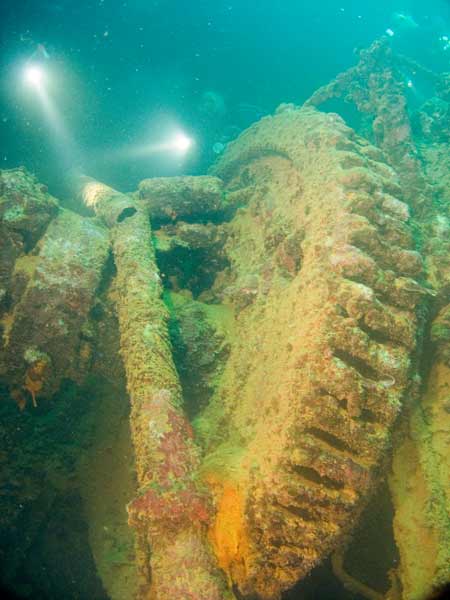
through the torpedo hole | The flywheel of the Hoyo Maru's engine |
The first major thing you will see as you head towards the stern is the torpedo/bomb hole. This is located on the port side (that is the left side as you are swimming). A bit further on there is another smaller hole. The engine room can be accessed via this hole. You can see the catwalks and ladders and there are things like generators, drums, as well as pressure pipes and gauges. There is a large electrical switchboard at the top left as you enter.
The engine is near the front as you enter and is upsidedown and twisted. The geared flywheel can be seen at the rear of the engine and part of the prop shaft is visible.
Back outside you will see that there is a gap between the sand bottom which is about 34 to 36 metres and you can swim between the two. Ascending you will see the large four bladed prop which is very impressive and if you get clean water, can make a very good photograph.
Swim forward along the starboard side and you will soon come to a section of bomb damage. Here the ship's deck is clear of the sandy bottom for about 20 metres and you can swim under the wreck. This is extremely interesting. There are a few hatches that give access into the oil tanks. I went up and stuck my head into one, but as you can image, it was very dark, very scary and very empty. Not worth entering!
Exit on the other (port side) and continue forward. Shortly you will come to the split in the hull. Here you can enter the oil tank in the forward section. It is quite large and there are heating coils at the bottom of the tank (of course this is at the top as you look at it).
 |  |
| The prop of the Hoyo Maru | Kelly McFadyen swimming under the Hoyo Maru |
Once again exit the hull and swim forward outside. A short distance along you can once again go under the deck of the ship as it is clear of the sand. You can swim along for about 30 or 40 metres. This is quite interesting.
When you come out you will be almost at the bow. The depth on the bottom rises to 15 metres at the bow. You will see the anchor chain out and the apparently the gun platform can be seen under the wreck, with the gun barrel is twisted from the weight of the ship above. However, I did not see this.
About 10 metres from the bow there is more damage to the hull, a large hole caused by another bomb or torpedo on the starboard side (?). Swim back towards the stern and the hull split, this time along the top of the upturned hull. Keep an eye open for the many tiger pipefish that seem to inhabit the hull of the Chuuk wrecks.
Once back at the split, you can enter either section but care should be taken. Do not go too deep inside as it is very dark. Have someone stay close to the outside and maintain visual contact with them at all time.
To end the dive, rise up to the hull bottom and do your safety stop on the top of the bow section. This has some very nice coral, sponges and gorgonias as well as fishlife.
The visibility in this part of Chuuk Lagoon is never great. The normal visibility is from 10 to 15 metres. Yet another very good wreck, somewhat spoiled by being upside down and suffering from poor visibility (for Chuuk at least).
Dives:
21 October 2011
References:
Hailstorm over Truk Lagoon by Klaus Lindemann
Hailstorm - The Dive Guide by Klaus Lindemann
WII Wrecks of the Kwajalein and Truk Lagoon by Dan E. Bailey
26 Principal Shipwrecks of Truk Lagoon by Capt. Lance Higgs
| 
 v6.00.307 © 2003-2005