|
Michael McFadyen's Scuba Diving - Nippo Maru
The Nippo Maru, as many other Chuuk Lagoon wrecks, was sunk on 17 February 1944. During the first raids of Operation Hailstone, it was hit by three 500lb bombs in the stern area causing its demise.
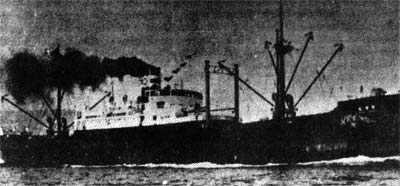 |
| A very poor photo of the Nippo Maru |
The Nippo Maru was launched on 16 September 1936 from the Kawasaki Dockyard Co Ltd in Kobe, Japan. It displaced 3,764 tons and was 353 feet long and 50 feet wide. She went into service on 9 November 1936 for Okazaki Honten KK and then possibly later Mitsubishi. The new vessel was 3,763 tons gross, 107 metres (353.6 feet) long and just over 15 metres (50.0 feet) wide. Powered by two Kawasaki coal powered steam turbine engines (500NHP total) geared to the one shaft, the Nippo Maru was capable of 16.3 knots.
In 1941 the ship was requisitioned by the Japanese defence force and used for various transport purposes. At the time of its sinking, the Nippo was being used to carry water, fire wood and other supplies as well as armaments to Japanese troops on the many Pacific islands they occupied.
In 1969, the Nippo Maru was filmed by the Cousteau expedition but not identified. It was then "lost" until rediscovered on 16 June 1980 by Klaus Lindemann. The Nippo lies on a sand bottom in 48 metres of water, lying in an east-west direction with the bow slightly shallower than the stern and having a slight list to port. The wreck is basically intact, with only slight damage to the bridge area and stern visible.
A GPS Reading of N7° 22' 57.3" E151° 54' 37.0" using WGS84 as the datum will put you on the bridge. This is where the smaller dive boats anchor, but there is a mooring off the bow.
Stern Dive
The best way to explore the Nippo is to head towards the stern to do the deeper sections first, although if you are planning a shorter dive, the bow is probably better. The top of the bridge is about 27 to 28 metres. Once on the bridge area the first thing you notice is the funnel which has collapsed to the port side. Behind the funnel are the engine room skylights. The starboard ones are partially open but they are not wide enough to give access to the engine room. At the present time I am unsure of how to gain access.
 |  |
| The Engine Room Skylights and the Bridge in background | The three field guns on the starboard deck |
Heading to the stern and travelling along the deck on the starboard side you will come across three small artillery pieces, American made and believed to have been captured in the Philippines. Klaus Lindemann writes in his book Hailstorm over Truk Lagoon that the artillery guns were affixed to "mounts" on the deck. There are certainly three strange looking objects welded to the deck near these guns but I must disagree with Mr Lindemann's thoughts on this matter. His claim does not seem to make sense and this was confirmed by others diving with me. A lot of artefacts are located on the guns, including binoculars, plates, tea pots, gas masks and cooking utensils. There used to be a thigh bone here as well but on my visits after 1991 it was not seen.
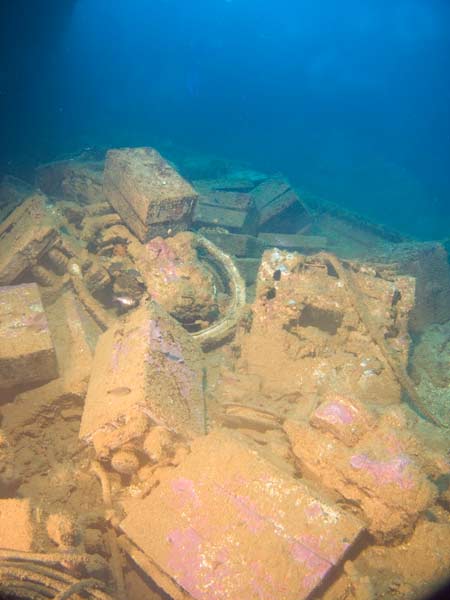 | 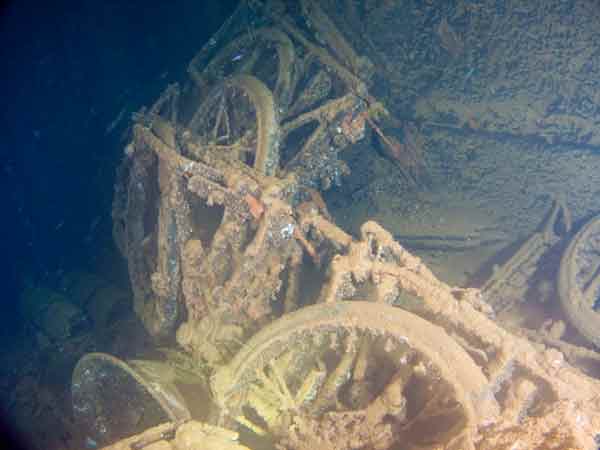 |
| Some of the batteries in Hold 4 | The bikes in the back left of Hold 4 |
 | 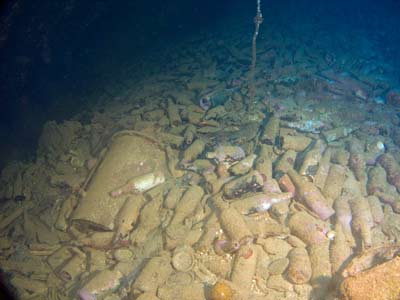 |
| Some other items in Hold 4 | Some of the bottles in Hold 4 |
Further along there are at least two large barrels for field guns lying on the deck against the starboard edge of Hold 5. There may be two or three more buried under the silt and sand.below the two clear ones.
Hold 4 right behind the superstructure has batteries and huge aluminium water containers. There are hundreds of the quite large batteries on the rear port side. On the 'tween decks there are hundreds of bottles on the forward section. On the starboard 'tween deck, at the rear, there are at least four collapsible bicycles, although there is mention that they are carts of some sort. Anyway, the wheels are clearly visible. There are also a lot of bed heads here as well.
Hold 5, the rear most hold, has at least eight more gun barrels, gun breeches, gun sighting mechanisms and large gun turrets. There are also other objects such a cement bags (forward on starboard side). In the hold you reach the greatest depth of the dive of about 48 metres. Behind Hold 5 there is a spare anchor against the poop deck. It now lies across the opening to the port door. Inside the poop deck there are coils of rope.
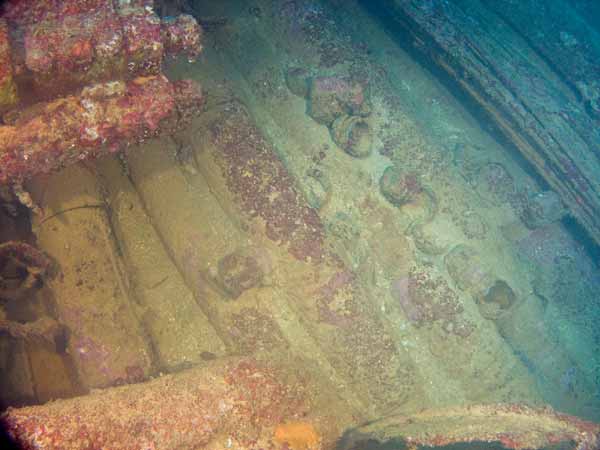 |  |
| The gun barrels in Hold 5 | One of the gun bases in Hold 5 |
 |  |
| One of the gun mechanisms in Hold 5 | Another photo of the two barrels on the deck adjacent to Hold 5 |
Behind the ship there is a small "hill" of sand and most of the stern section is level with the sand. There is a gun platform but no gun (it may have fallen off as the ship sank). Head towards the front again (unless you are doing this as a "back section only dive") to see the rest of the wreck.
As you return exit from Hold 4 and approach the main superstructure area from the port side you will pass over a bomb-like object resting against the railing. Right between the hold and the superstructure there are another three identical objects. At first these appear to be bombs, one resting on the deck, another on top of a vice and the third partially through the deck.
On the passageway at the rear of the superstructure there are another 10 or more identical "bombs". However, they are not bombs, but minesweeping paravanes. These objects were towed behind a vessel and used to explode mines. Check out the ring on the nose for towing as well as the fins on the nose and side of the body, how they would cause the thing to dive under the water. The four on the deck have obviously fallen out of the passageway as the ship was sinking.
On the sand on the port side adjacent to the bridge is a very strange looking object. It resembles a teardrop with a hole in the middle and appears to be about 7 to 10 metres long. See the photograph. Any ideas?
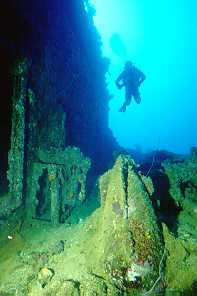 | 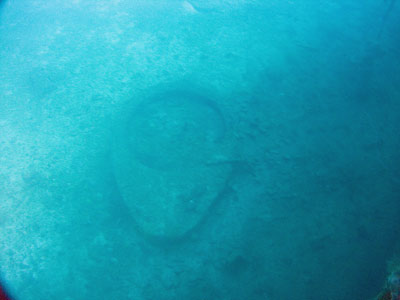 |
| Two of the minesweeping paravanes | The strange object off the port side of the superstructure |
By now you will probably be needing to end your dive. The above dive will have taken you about 18 minutes. Spend the next few minutes exploring the bridge. See the Bow Dive below for a description of the bridge. When yon end the dive at 20 minutes, you will have around three minutes at six metres and nine minutes at three metres of decompression. Also, you will most certainly have little air remaining from a single tank.
Bow Dive
Leaving the bridge till the end of the dive to examine, swim towards the bow.
On the port side in front of Hold 3 and adjacent to Hold 2 is a small tank, the same type as the three on the San Francisco Maru. The tank is intact except for the gun barrel that is no where to be seen. This is because the barrels were generally removed while being transported and it is likely that it is inside the tank. You can get some very good photographs of this tank.
 | 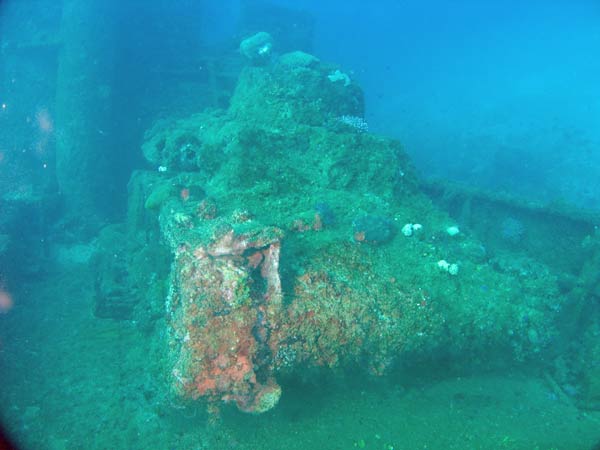 |
| Kelly McFadyen and the tank on the port deck | Another shot of the tank |
On the sand below the port side of the bow there is a truck. All that remains is the chassis, wheels (dual rear), engine, radiator and the fallen steering wheel. There is a large gorgonia on the radiator that makes an excellent photograph.
Also on the sand around the truck are two large acid bottles, one large lantern (all great photo opportunities) as well as various other bits and pieces. The crane arms from the front mast also lays across the port side out over the sand and makes a very interesting backdrop. The sand here is about 44 metres.
 |  |
| The truck on the sand in front of the crane arms | Another photograph of the truck |
Ascending to the bow you can see another truck which is half over the deck railing. It is very damaged, with no radiator, just the chassis, engine and wheels (dual rear) remaining. The forecastle can be entered and it is also quite interesting. There is no bow gun.
Enter Hold 1 and you will find hundreds of shells, hundreds of 200 litres drums (most stuck to the ceiling), gas masks, firewood (stacked in at least four rows at rear of hold). There is also a lot of hose pipe. At least one hatch beam has fallen into the hold.
 | 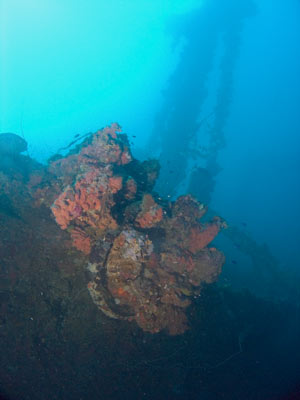 |
| Two acid bottles on the sand near the truck | The truck hanging over the port deck adjacent to Hold 1 |
Hold 2 also has at least four enormous aluminium water containers on the bottom. The 'tween deck has beer bottles, scaffolding (at least that is what it looks like), personal water bottles and perhaps a periscope. I have not seen this mentioned in any book about Chuuk but this is what it appears to be to me. The depth gets to 42 metres here.
Hold 3 (the main one in front of the bridge) has some beer bottles in the 'tween decks. Other than this, it appears to be empty.
 |  |
| Just some of the incredible array of objects in Hold 1 | The aluminium water tanks in Hold 2 |
 | 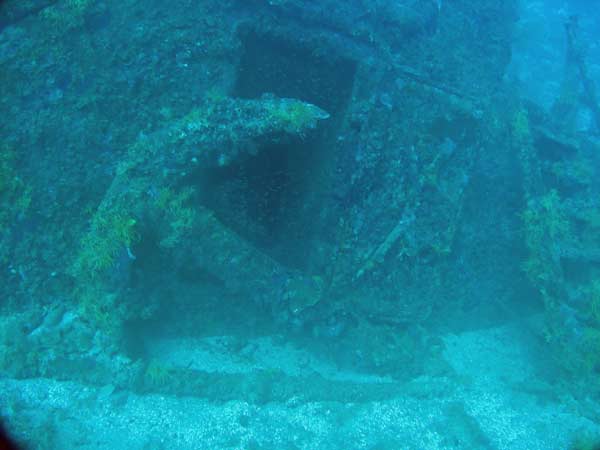 |
Inside Hold Two - shells in foreground
and aluminium water tanks in background | The spare anchor which is up against the poop deck |
There appears to be another small hold right in front of bridge (the Chuuk books do not mention it). This contains coal for the engine and it is probably just a coal bunker. You can swim into it from below the bridge and exit through a chute which leads to the rear and side of the bridge.
Spend your final moments in the bridge area and under the superstructure. Finish examining the bridge which is extremely interesting. The bridge has the telegraph and steering helm to see as well as other interesting compartments and objects such as radio sets.
The above dive will take about 25 minutes. You will have about one minute at six metres and 10 minutes at three metres decompression using a Uwatec computer (first dive of the day).
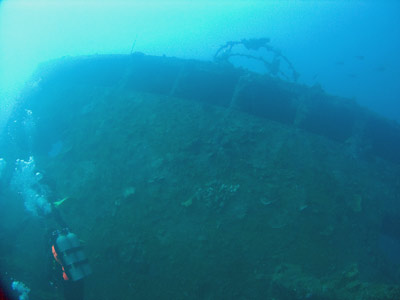 |  |
| Looking up at the bridge of the Nippo Maru | The telegraph on the Bridge of the
Nippo Maru with a kingpost in background |
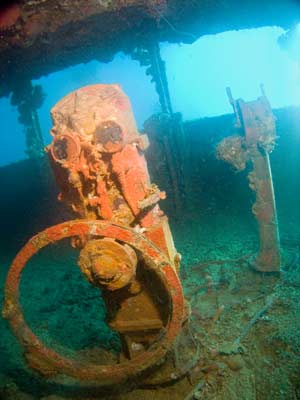 |  |
| The helm and telegraph of the Nippo Maru | Inside the bridge of the Nippo Maru
looking towards the starboard side |
Both these dives are deeper dives, with the stern been a fair bit deeper overall. However, even relatively inexperienced divers should be able to dive the bow easily. The conditions are nearly always ideal, with flat seas, no current, 29°C water and visibility of 30 or more metres. These conditions make it far different to diving, say, the SS Tuggerah off Sydney which is a similar depth.
The Nippo Maru is a fantastic wreck, one of the best in Chuuk Lagoon. It is worth visiting at least two times to see it even briefly. A must do dive when you visit Chuuk.
3D INTERACTIVE MODEL
Click here to see a very cool interactive model of the wreck.
Dived:
21 November 1991
16 February 1994
18 February 1994
8 November 1997
10 November 1997
5 Septemer 2004
8 September 2005
19 October 2011
25 October 2011
Additional Photos
Photos by Shaun Reynolds taken March 2013.
 |
| The stern of the Nippo Maru |
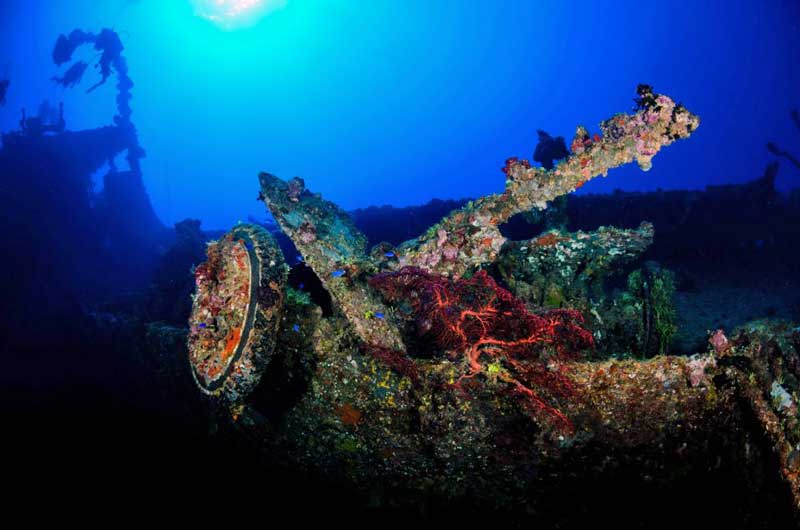 |
| One of the artillery guns on the rear deck of the Nippo Maru |
References:
Hailstorm over Truk Lagoon by Klaus Lindemann
WII Wrecks of the Kwajalein and Truk Lagoon by Dan E. Bailey
26 Principal Shipwrecks of Truk Lagoon by Capt. Lance Higgs
Lloyds Register 1936-37, 1938-39, 1945-46
| 
 v6.00.307 © 2003-2005